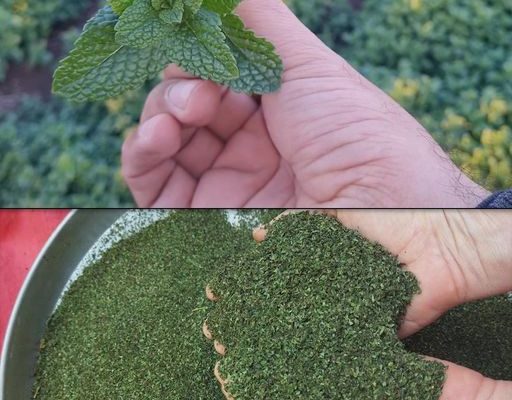
Welcome to my kitchen! Today, I’ll show you how to dry mint at home using completely natural methods. Drying your own mint is a great way to preserve its flavor and aroma for use in cooking and teas all year round. Let’s dive into the process, step by step.
Harvesting the Mint
First, you’ll need to harvest your mint. If you have a garden, wait until the mint plants have grown well and are lush. The best time to harvest is when the plants are at least a hand’s breadth tall. Sunny days are perfect for this task as the weather aids in the drying process.
Use a pair of scissors or garden shears to cut the mint stems from the base. Gather the stems and prepare to clean them thoroughly.
Cleaning the Mint
Place the freshly cut mint stems into a large, perforated bag or a colander. This will help to wash away any dirt or insects. Rinse the mint under plenty of water, ensuring all the leaves are well-cleaned. It’s essential to remove any contaminants to ensure the mint dries clean and safe.
Drying the Mint
After washing, it’s crucial to let the mint dry completely to avoid mold. Hang the bag or colander in a well-ventilated area to let the excess water drain off. This should take about half an hour.
Spread the mint leaves on a clean sheet or cloth in a shaded area. Avoid direct sunlight, as this can cause the mint to lose its vibrant green color and some of its essential oils, resulting in a less flavorful product.
Instead, let the mint dry in a cool, shaded place with good airflow. Depending on the weather, this process can take anywhere from three to seven days. It’s important not to leave the mint outside overnight, as dew can add unwanted moisture.
Processing the Dried Mint
Once the mint is completely dry and crisp to the touch, it’s time to remove the leaves from the stems. The leaves should crumble easily. Separate the leaves from the stems by hand, ensuring no large stems remain.
For finer mint, you can use a sieve to break the leaves into smaller pieces. Place the dried leaves in a sieve and gently rub them through. This will also help to remove any remaining small stems or debris.
Storing the Dried Mint
Store the dried mint leaves in an airtight container. Mason jars work wonderfully for this purpose. Ensure the jar is completely dry before adding the mint to prevent mold. Pack the mint leaves loosely into the jar, but make sure the lid is sealed tightly.
Keep the jar in a cool, dark place. Properly stored, dried mint can last for several months, retaining its wonderful aroma and flavor.

8 Amazing Health Benefits of Mint
- Aids Digestion: Mint is well-known for its ability to aid digestion. It can help relieve indigestion and bloating, making it a great after-meal herb.
- Relieves Headaches: The menthol in mint can help relax muscles and ease pain, providing relief from tension headaches and migraines.
- Boosts Immune System: Mint has a high content of antioxidants, which help strengthen the immune system and protect the body against infections.
- Improves Oral Health: The antibacterial properties of mint help in reducing harmful bacteria in the mouth, which can improve overall oral hygiene and freshen breath.
- Alleviates Respiratory Disorders: Mint’s strong aroma and anti-inflammatory properties can help clear up congestion and soothe the respiratory tract, making it beneficial for conditions like asthma and bronchitis.
- Enhances Memory and Focus: Studies suggest that mint can enhance brain function, improving memory and increasing alertness.
- Reduces Stress and Anxiety: The aroma of mint has a calming effect, which can help reduce stress and anxiety levels.
- Supports Skin Health: Mint has anti-inflammatory and antibacterial properties that can help treat skin conditions like acne and inflammation.
Drying your own mint at home is not only a great way to preserve this versatile herb but also a step towards a healthier lifestyle. Enjoy the process and the many benefits that come with using home-dried mint! If you found this guide helpful, please share it on social media and consider subscribing to my channel for more home gardening and cooking tips. Stay healthy and enjoy your homemade mint!

